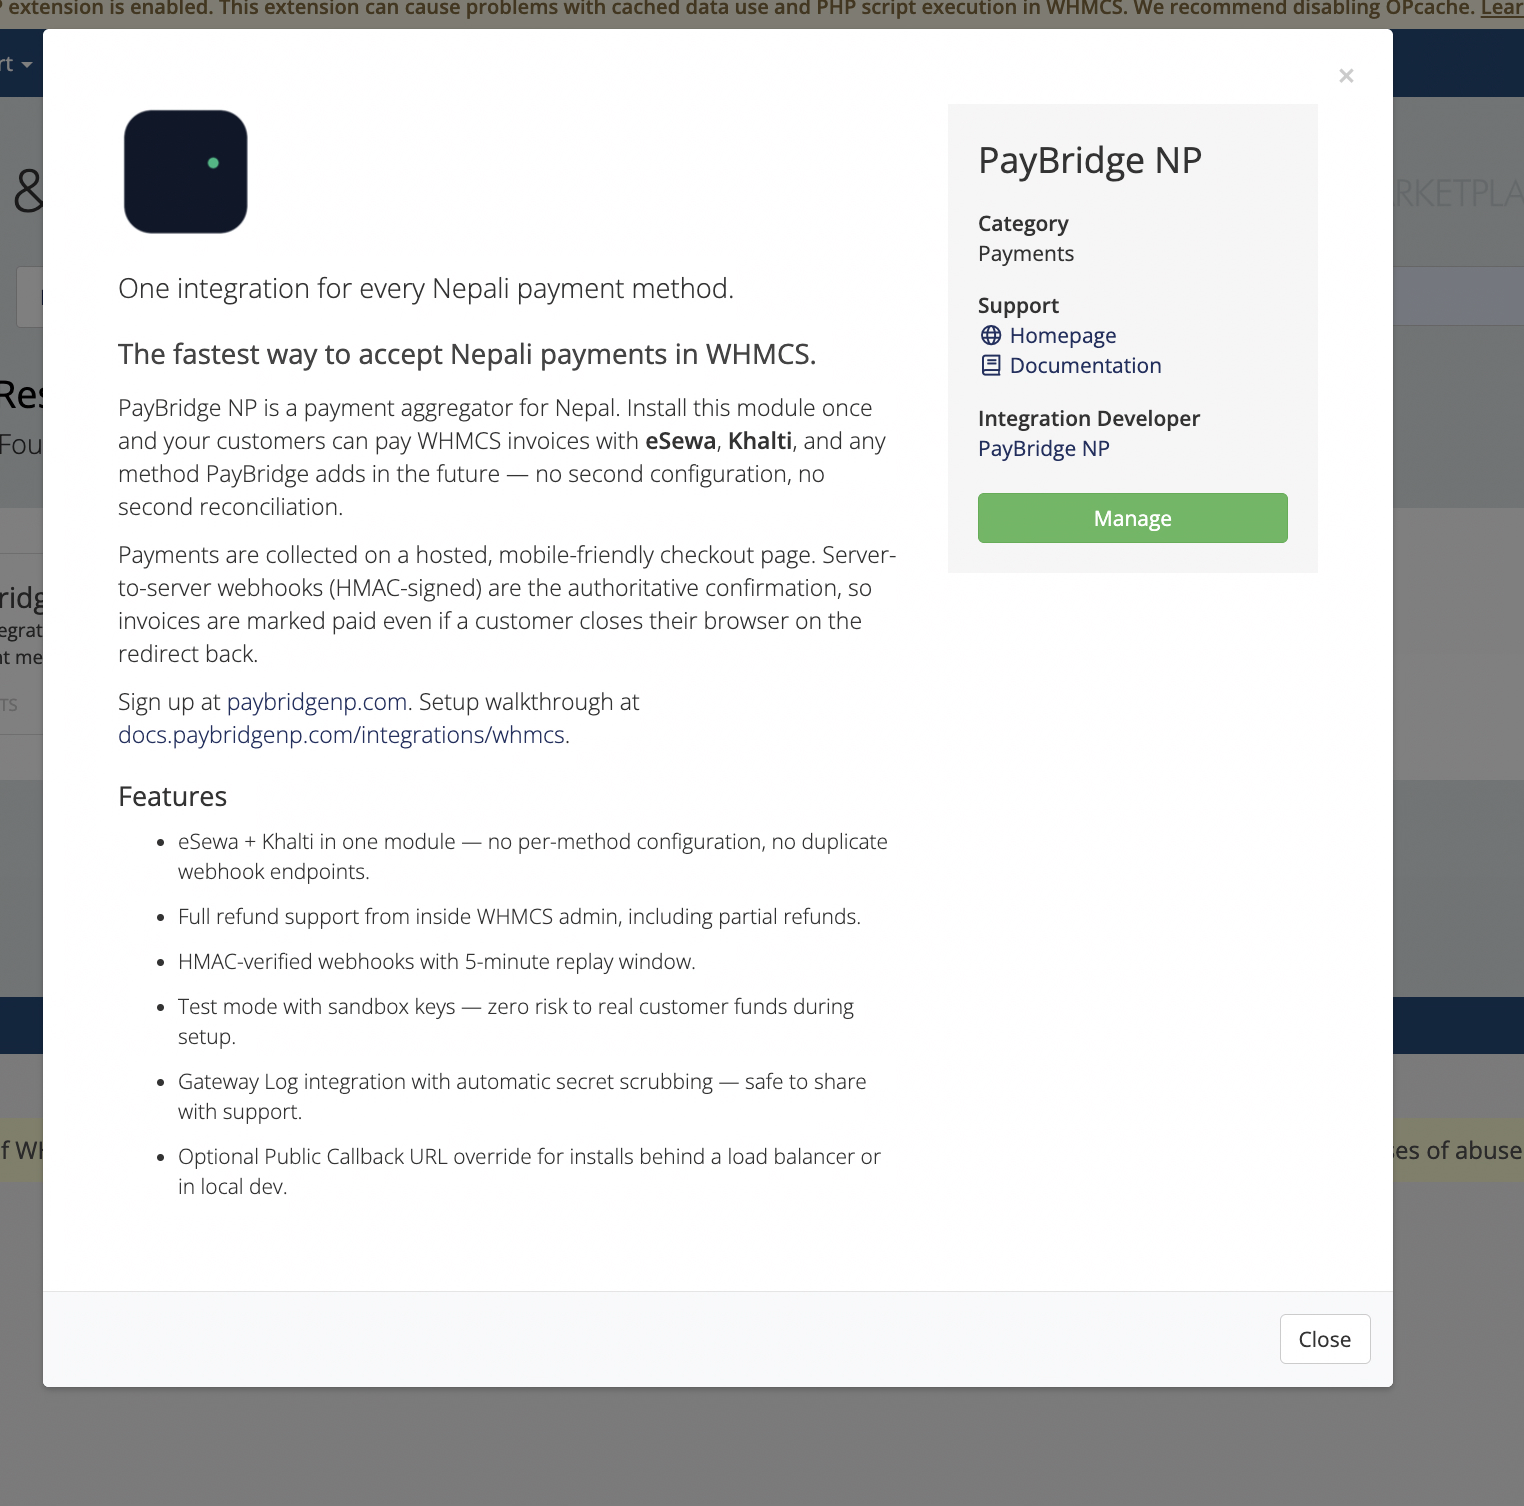
WHMCS is the standard billing platform for web hosting companies, domain registrars, and managed service providers in Nepal. But WHMCS's built-in payment gateways don't support Khalti, eSewa, or ConnectIPS - leaving Nepali hosting companies stuck with manual bank transfers for local customers.
PayBridgeNP's WHMCS module solves this.
Who This Is For
- Nepali web hosting companies billing clients in NPR
- Domain registrars with Nepali customer bases
- Managed service providers and IT companies using WHMCS for invoicing
- Anyone using WHMCS who wants to accept digital payments from Nepali clients
What the Module Does
The PayBridgeNP WHMCS module adds a payment gateway option that:
- Appears on client invoices as "Pay with Khalti / eSewa / ConnectIPS"
- Redirects clients to PayBridgeNP's hosted checkout
- Automatically marks invoices as paid on payment completion
- Handles refunds from WHMCS admin
- Supports partial payments
- Works with WHMCS's recurring invoice system
Requirements
- WHMCS 8.0 or higher
- PHP 7.4+ (PHP 8.x recommended)
- A PayBridgeNP merchant account (free to create)
- cURL enabled in PHP
Installation
Step 1: Download the module
Download the PayBridgeNP module from paybridgenp.com/integrations/whmcs or from the GitHub releases page.
Step 2: Upload files
Extract the archive and upload the contents to your WHMCS installation:
/path/to/whmcs/modules/gateways/
  paybridge.php
  paybridge/
    callback/
      paybridge.php
    lang/
      english.php
The module files should go into modules/gateways/. Do not place them in any subdirectory.
Step 3: Activate in WHMCS
- Log in to your WHMCS admin panel
- Go to Setup > Apps & Integrations (or Setup > Payment Gateways on older versions)
- Find PayBridgeNP in the list
- Click Activate
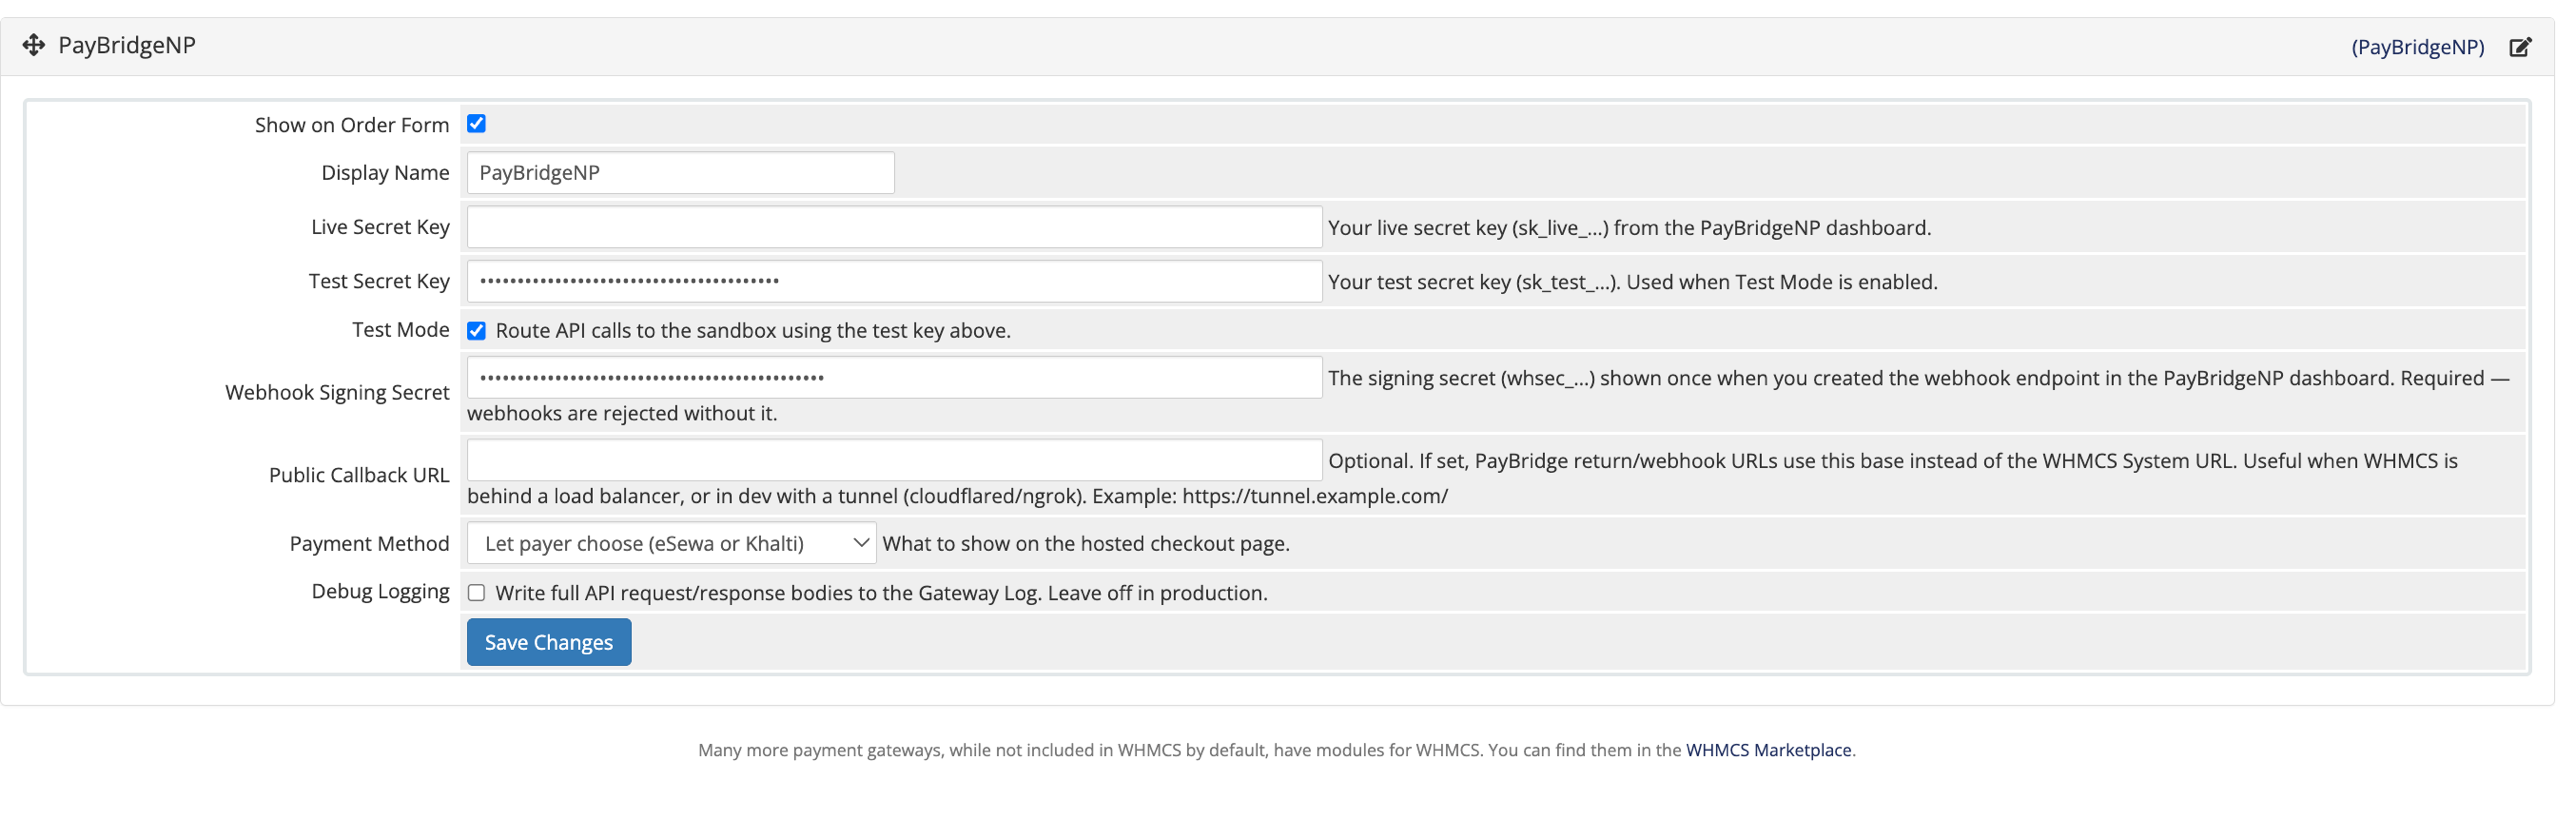
Step 4: Configure the module
In the PayBridgeNP gateway settings, enter your API keys from the PayBridgeNP dashboard:
- Live Secret Key: Your
sk_live_...key - Test Secret Key: Your
sk_test_...key (for sandbox testing) - Enable Test Mode: Toggle on/off for sandbox vs production
- Webhook Secret: Set this to the secret from your PayBridgeNP webhook settings
Step 5: Register the webhook
In your PayBridgeNP dashboard:
- Go to Developers > Webhooks > Add Endpoint
- URL:
https://yourbilling.com/modules/gateways/callback/paybridge.php - Events: select
payment.succeeded,payment.failed,payment.refunded
Testing
Before going live, enable Test Mode and verify:
- Open a test invoice in WHMCS client area
- Select PayBridgeNP as payment method
- Click Pay Now
- Complete payment using sandbox credentials
- Confirm the invoice is marked as paid in WHMCS admin
How Clients Pay
When a client has an outstanding invoice:
- They log in to your WHMCS client area
- Open the invoice
- Select PayBridgeNP (or whatever label you configured)
- Click Pay Now
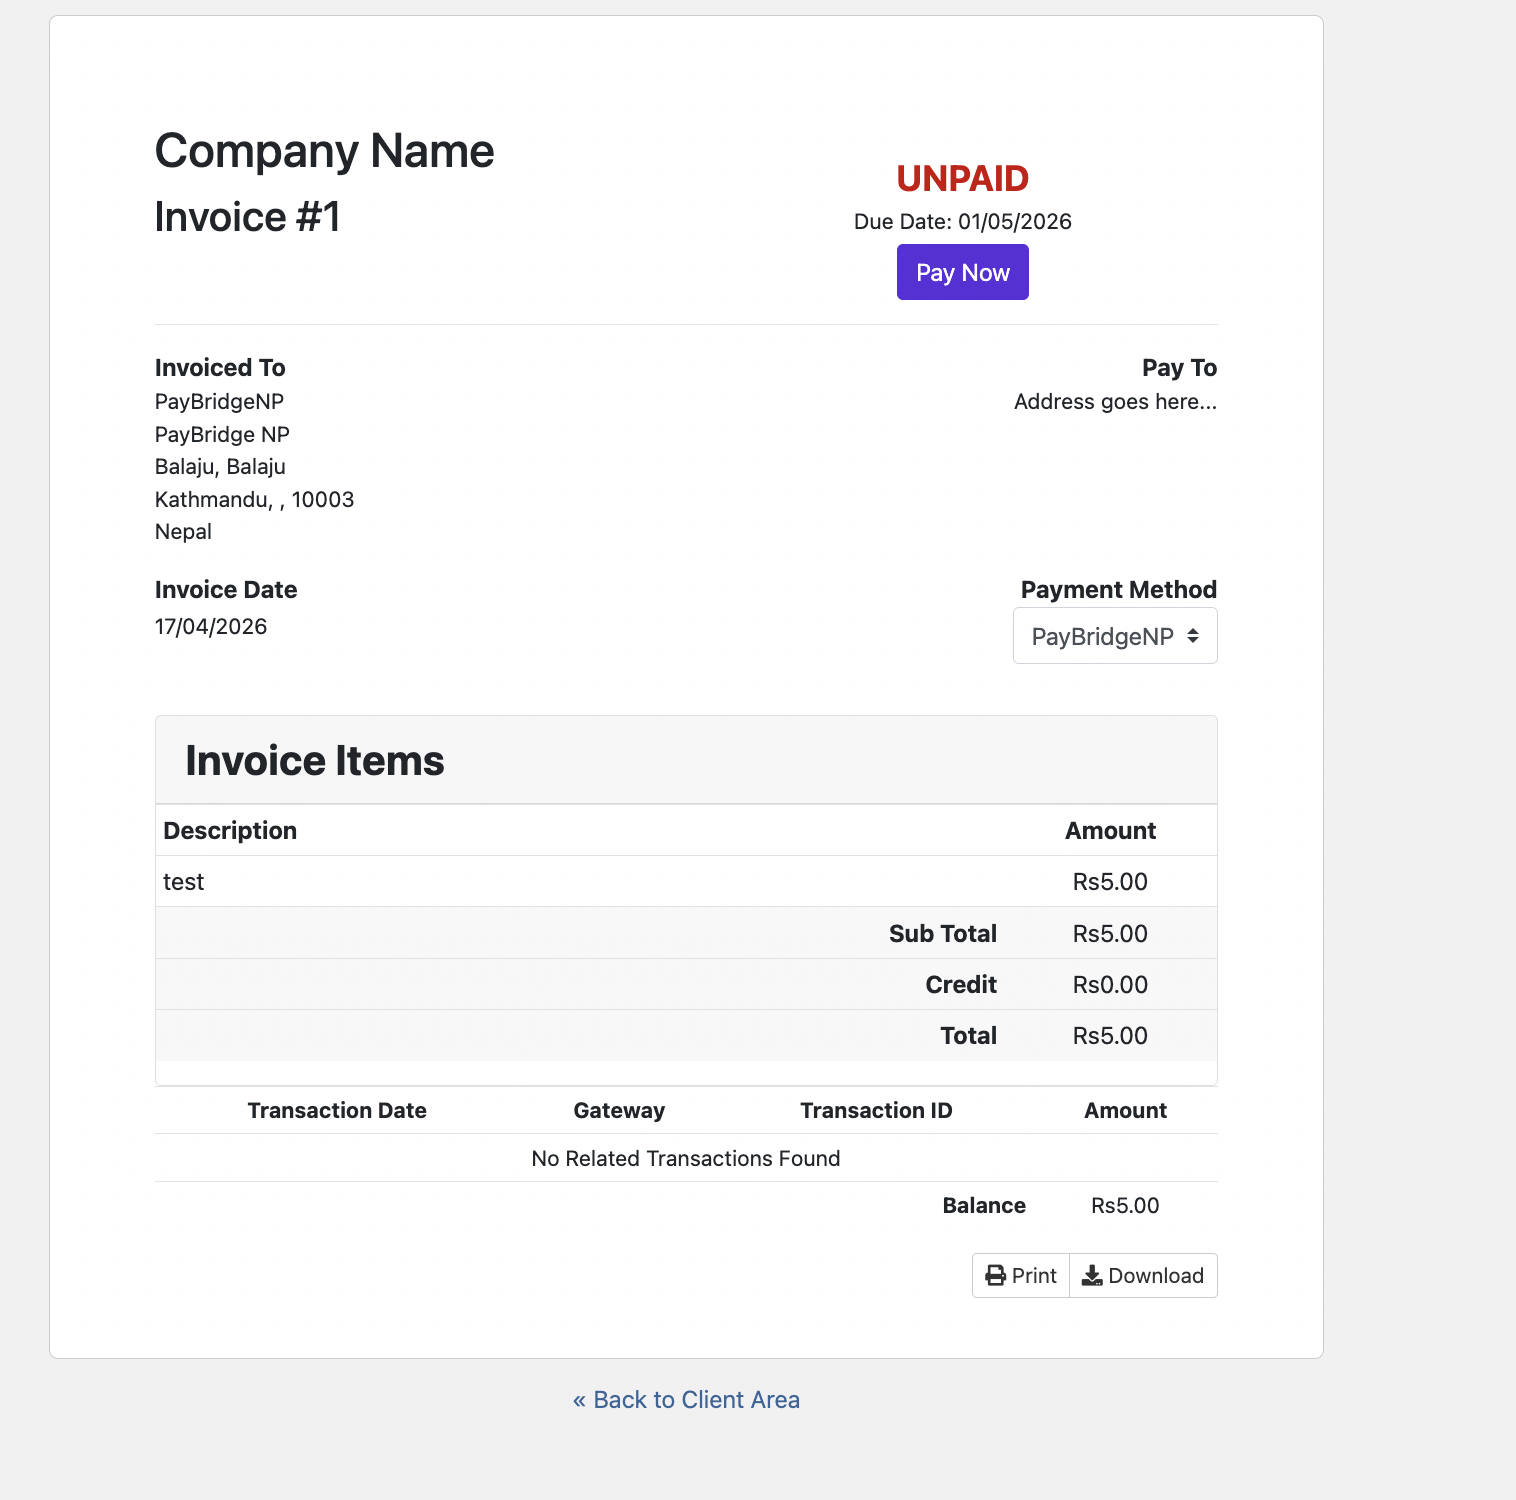
- They're redirected to PayBridgeNP checkout
- They select Khalti, eSewa, or ConnectIPS and complete payment
- They're returned to WHMCS and the invoice shows as Paid
The whole process takes under a minute.
Recurring Invoices
For hosting services with monthly/annual renewals, WHMCS generates invoices automatically. Clients can pay each renewal invoice via PayBridgeNP. There's no auto-charge (Nepali payment providers don't support card-on-file style recurring billing currently) - clients pay each invoice manually when due.
A good practice: configure WHMCS to send invoice reminders 7 days, 3 days, and on the due date. Include the direct payment link in the reminder email. See the recurring billing guide for strategies.
Admin Refunds
To refund a payment from WHMCS admin:
- Find the invoice under Billing > Invoices
- Click the transaction
- Click Refund
- Enter amount
- PayBridgeNP processes the refund to the client's payment method
Troubleshooting
The WHMCS gateway log records every transaction attempt, which is the first place to look when something doesn't work:
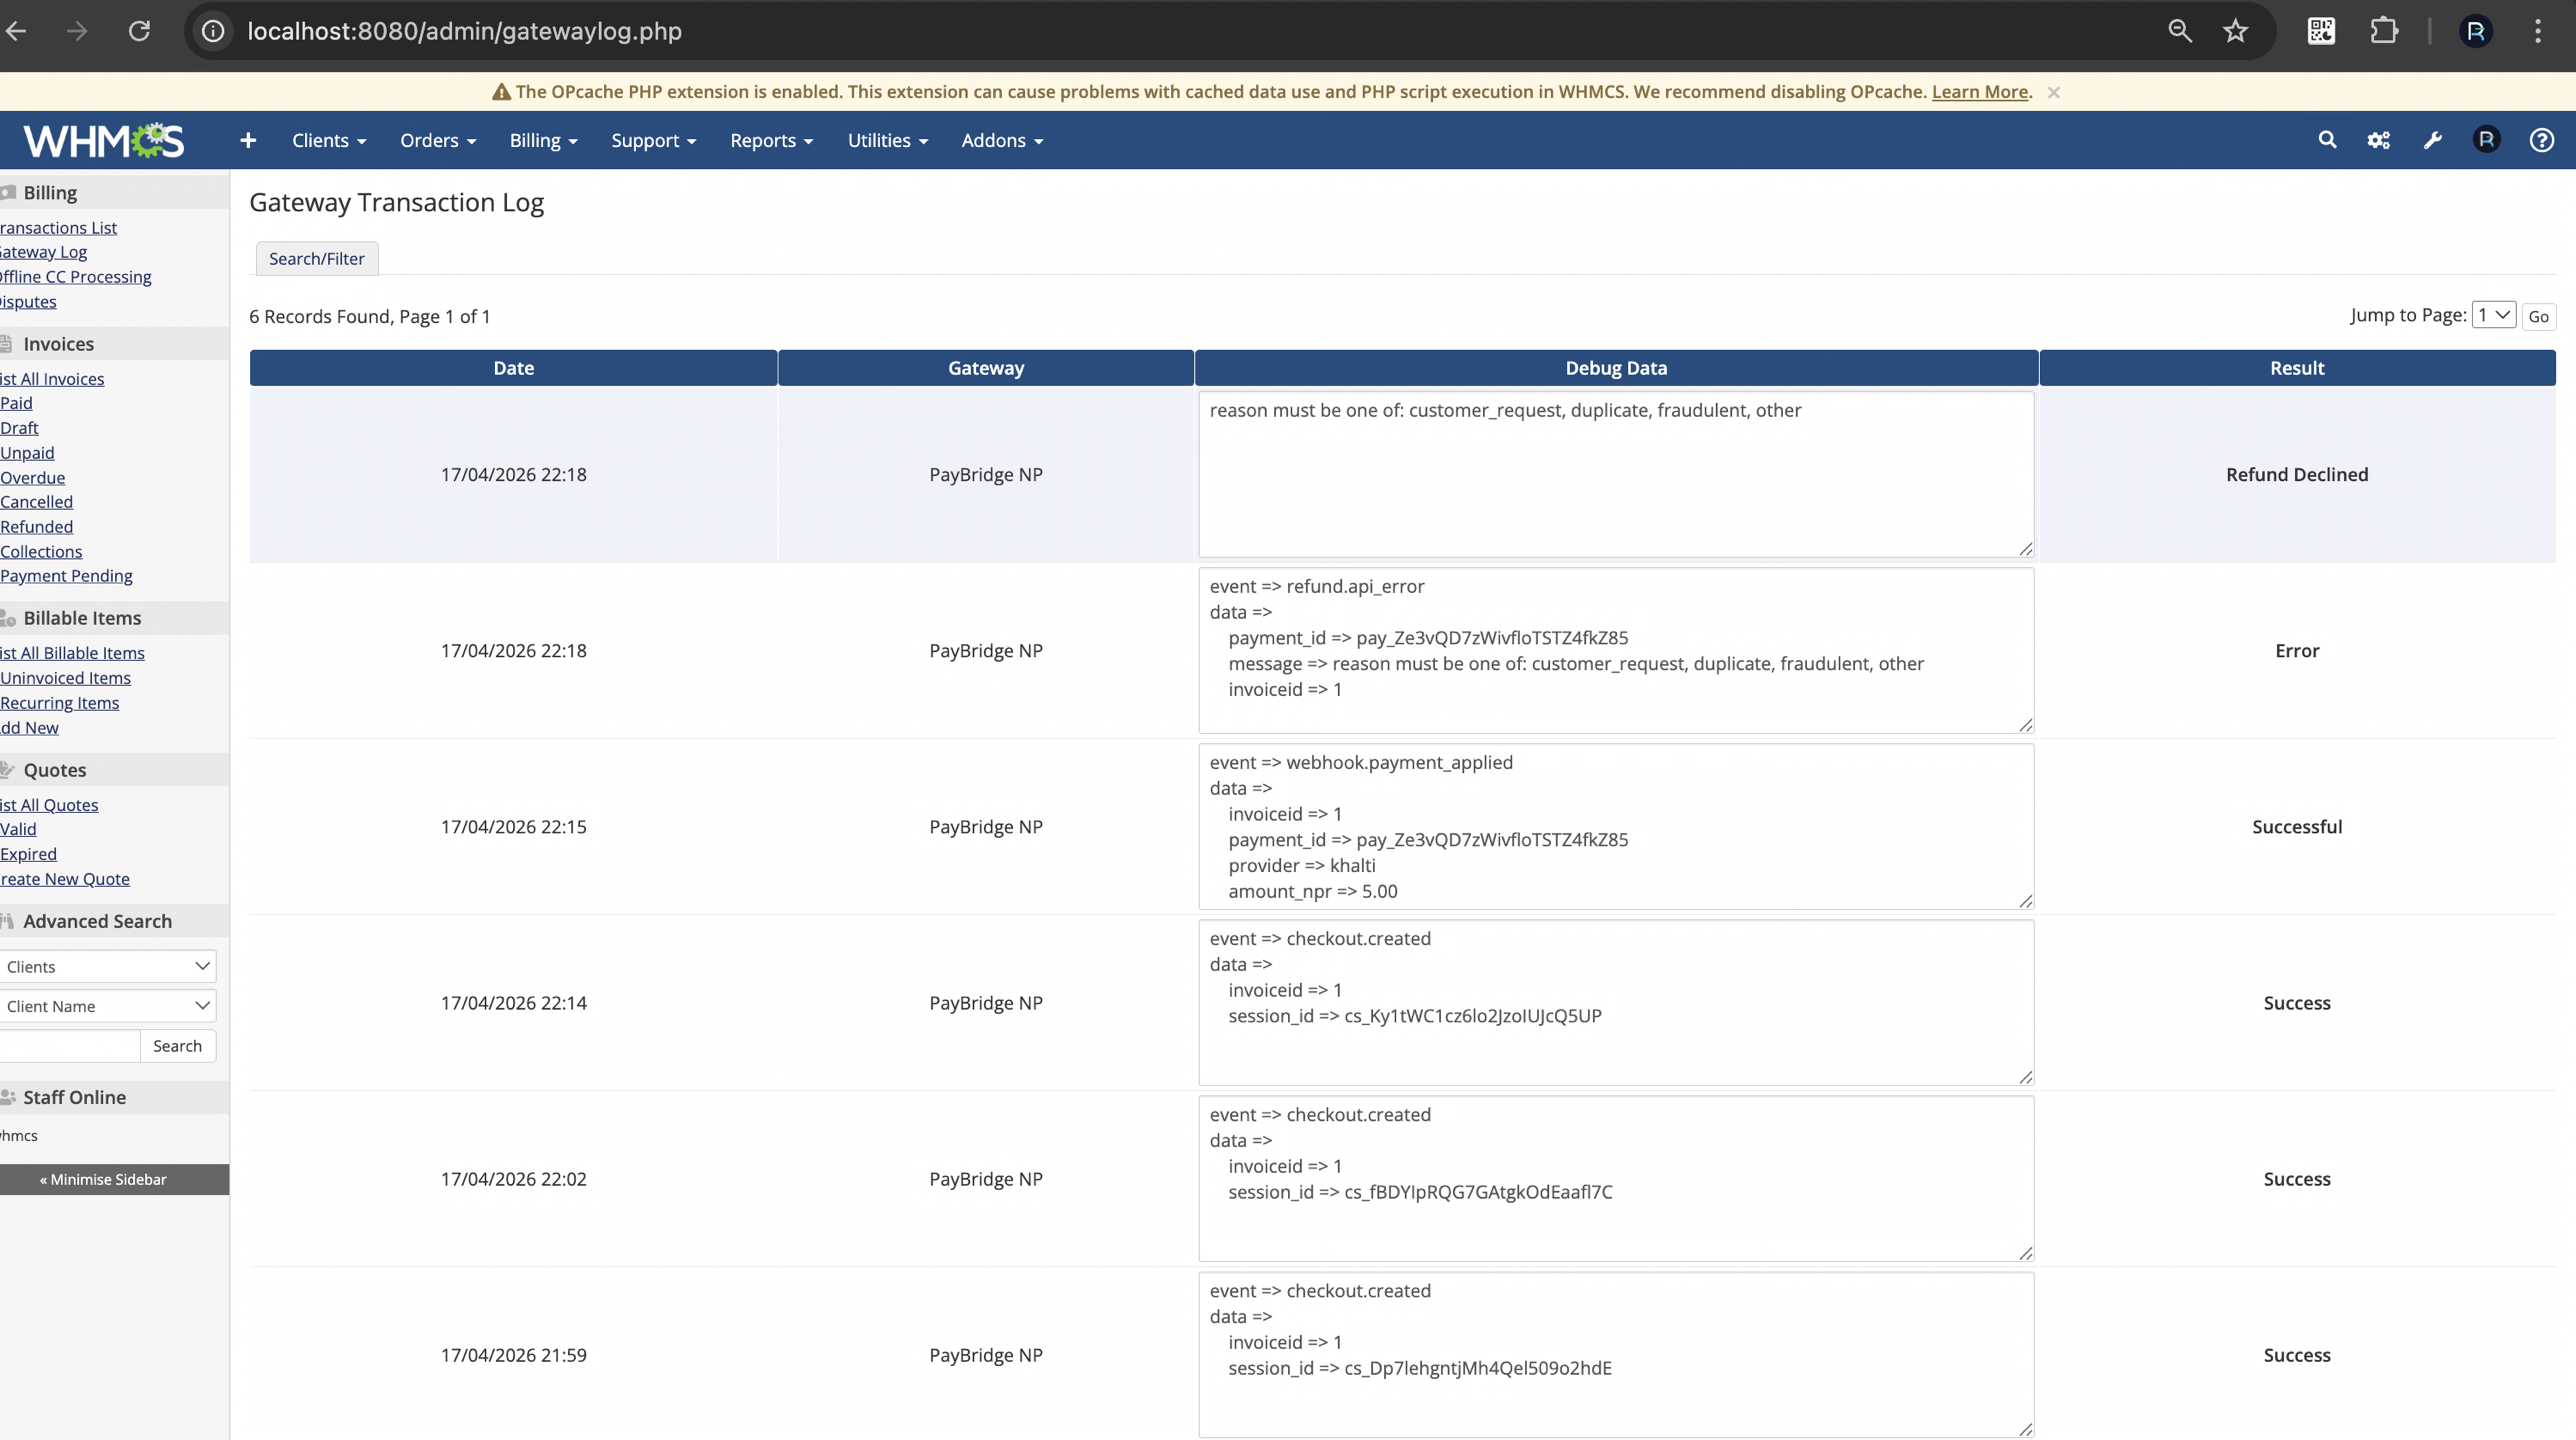
Invoice not marking as paid after payment: Check that your webhook URL is correctly registered and that the PayBridgeNP module has cURL access to the PayBridgeNP API. Also check the WHMCS Gateway Log for any errors.
Payment gateway not showing at checkout: Ensure the module is activated AND that your client's currency is NPR (or you've configured the gateway to show for all currencies).
SSL warning on redirect: PayBridgeNP requires HTTPS. Make sure your WHMCS installation has a valid SSL certificate.
Conclusion
The PayBridgeNP WHMCS module is free and takes under 15 minutes to set up. Visit the WHMCS integration page for the download and full documentation, or go straight to GitHub releases to download now.